![]()
In an age of increasing surveillance and internet censorship, protecting your privacy and online freedom is more important than ever. Outline VPN offers an easy-to-use solution for secure and unrestricted internet access. Whether you're safeguarding your data on public Wi-Fi or bypassing restrictions, Outline has become a go-to choice for individuals and organizations alike.
In this tutorial, we’ll walk you through how to use Outline VPN from start to finish — including setting up your own Outline server, connecting to the server via a client app, and sharing access keys.
What Is Outline VPN?
Outline is an open-source VPN project developed by Jigsaw (a Google-backed tech incubator). It uses Shadowsocks, a secure SOCKS5 proxy, to encrypt your internet traffic. What makes Outline different is its focus on ease of use and decentralization — anyone can create and manage their own private VPN server with minimal setup, you can easily set up an Outline server without necessarily needing to use Linux commands.
Getting started with Outline VPN is straightforward, even if you're not tech-savvy. The process involves two main steps: setting up your Outline VPN server, and connecting to it through the Outline app.
Setting up an Outline server
Before setting up an Outline server, you first need to get access to a VPS. You can use DigitalOcean, Vultr, AWS, or any VPS provider. For easiest setup, choose DigitalOcean, since Outline Manager supports one-click deployment with DigitalOcean.
Go to the website of DigitalOcean, click "Sign up" on the upper right corner of the webpage to register a new account. You can register by email, Google account, etc. If you register by email, remember to verify your email.
After registration, you need to fill in the billing information. You can use a credit card or PayPal. If you use a credit card, it will be charged hourly. If you use PayPal, you need to top up $6 first, which is the minimum cost for using a VPS for a month.
After you have an active DigitalOcean account, you can start to set up Outline server. We need to go to Outline's official website to download the Outline application software. According to feedback from Chinese netizens, Outline's official website cannot be accessed in normal condition in mainland China. So if you are currently in China and can't access it, you can go to GitHub to download it.
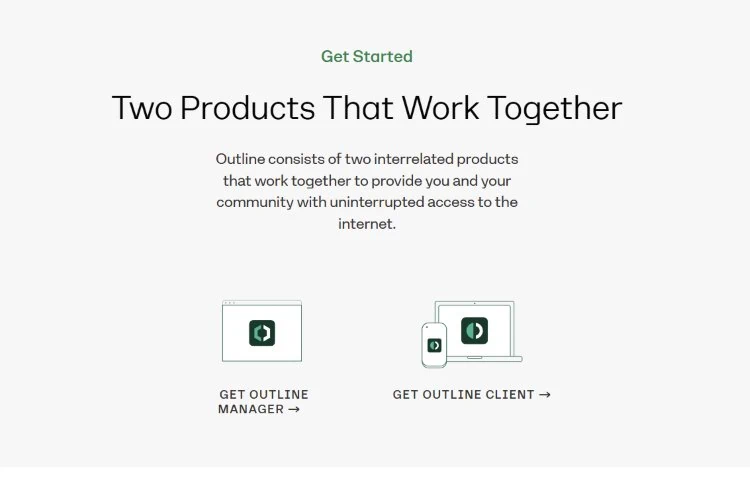
There are two applications available for download on the page. The one on the left is Outline Manager, which can help you deploy and manage your Outline server with just a few clicks. The one on the right is the Outline client application, which is used to connect our device to the server.
We first need to download Outline Manager to deploy an Outline server. Click "Get Outline Manager" to enter the download page, then scroll down a little and you can see that Outline Manager provides downloads for Windows, Linux, and MacOS.
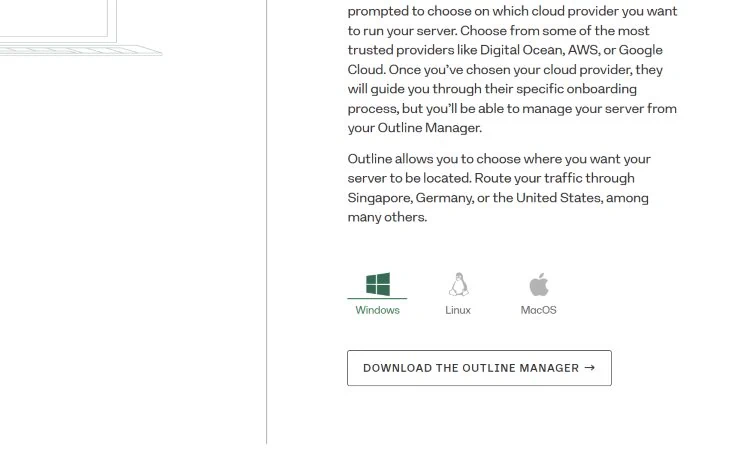
Please select according to your computer's operating system, and then click "Download the Outline Manager" to start downloading.
A dialog box will appear, asking you to select a save path. You can keep the default, and then click the Save button to download.
The downloaded file has an exe file extension. Double-click the file to install it. After installed, Outline Manager will automatically open, as shown in the screenshot below.
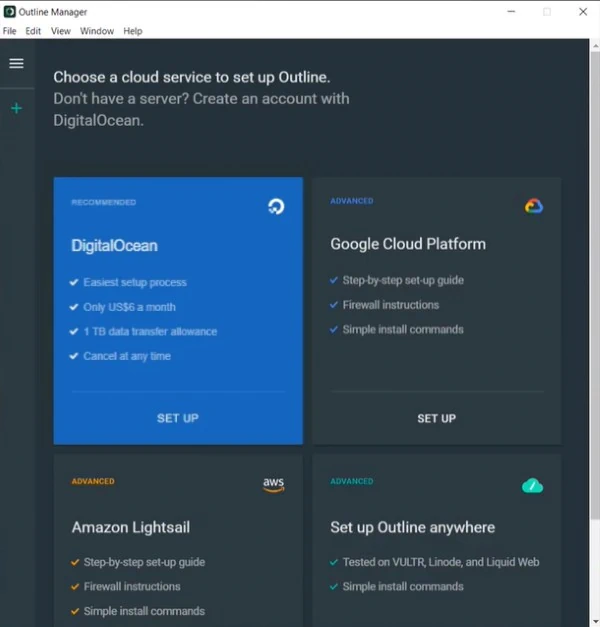
At the top of the interface, it says "Choose a cloud service to set up Outline", and you can see that there are four options, DigitalOcean is recommended because it is the easiest to deploy with DigitalOcean, and it is cheaper than Google Cloud and Amazon servers, but slightly more expensive than some other cloud services such as Vultr and Linode in the fourth option. For example, Vultr costs $5 per month. It’s just that the steps to deploy Outline with Vultr are slightly more complicated, the process will be explained in detail in another article. Here we will first talk about how to deploy Outline with DigitalOcean.
Clicking the Set up button in the DigitalOcean option will take you to a page on the DigitalOcean website, allowing you to authorize Outline Manager.
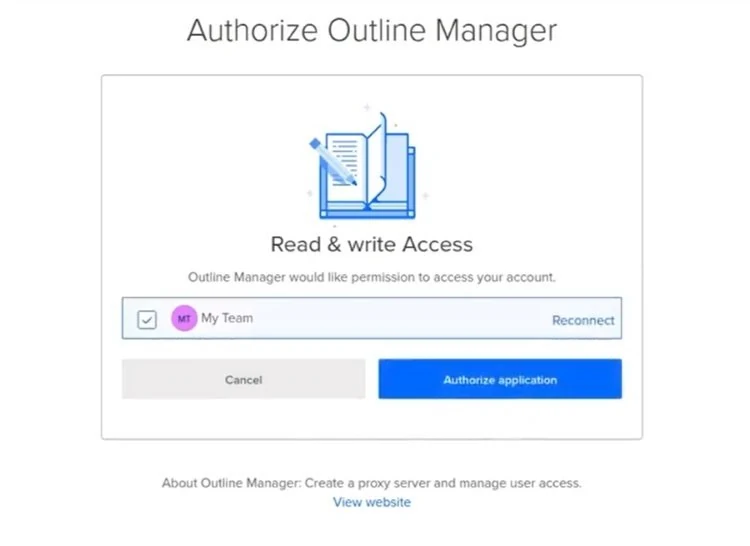
In the box below the "Authorize Outline Manager" text, it says that Outline Manager needs permission to access your DigitalOcean account, and below it is a long box showing your account name. Click the small box on the left to check it, then click the Authorize application button, the authorization will be completed, and you can close the browser page.
Next, return to the Outline Manager interface, which will ask you to select a location for the server. There are 8 cities in 7 countries to choose from, namely New York, San Francisco, Amsterdam, Singapore, London, Frankfurt, Toronto, and Bangalore.
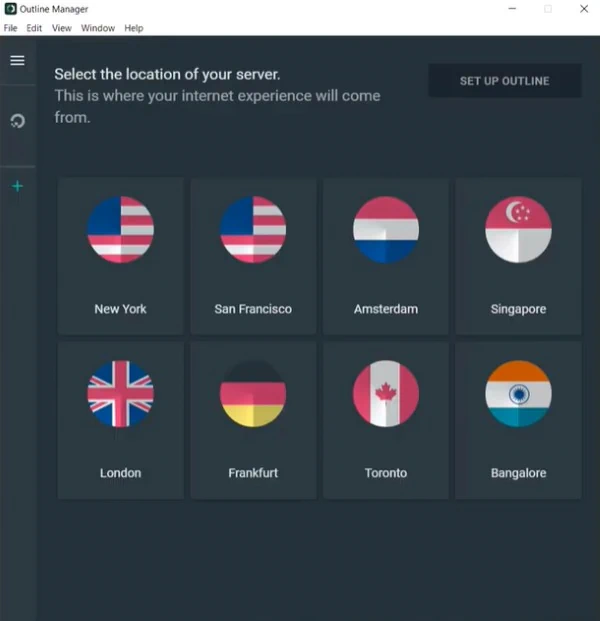
You can choose a location that you like. If you will be using Outline in mainland China, you can consider choosing Singapore, because in theory, the closer the server is, the faster the transmission speed will be, though in fact it's not very obvious, more important are other aspects, such as language, since choosing non-English countries such as Germany and India will make many websites display the languages of those countries, then you will need to do some additional adjustments; in addition, some content on some websites can only be accessed from certain countries, such as some Netflix episodes that can only be watched in specific countries.
After selecting the server location, click the Set up Outline button to deploy the server. Outline Manager will help you start a server on DigitalOcean in the location you chose and deploy Outline on it. This process takes about one to two minutes. After waiting for Outline to be deployed, the interface will display some basic information about the server, and also display an automatically created access key. We will use this access key later when we use the Outline client application.
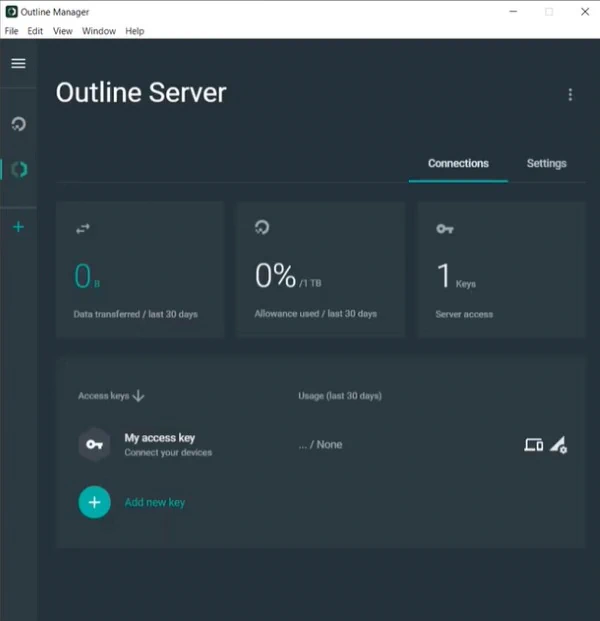
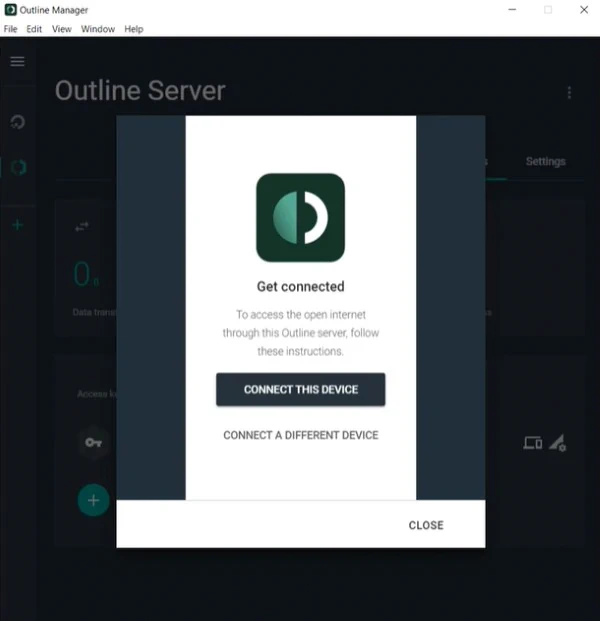
To use the access key, click the first icon on the right side of the My access key row. A pop-up window will pop up with a Connect this device button.
Connecting to the Outline server
If you want to use Outline on your current computer, you can click the "Connect this device" button to download the Outline client. If you want to use Outline on your phone or other computer, click the button below it, which is "Connect a different device".
Let's talk about how to use Outline on your current computer first. After clicking "Connect this device", a pop-up window will display a link, which is the specific access key.

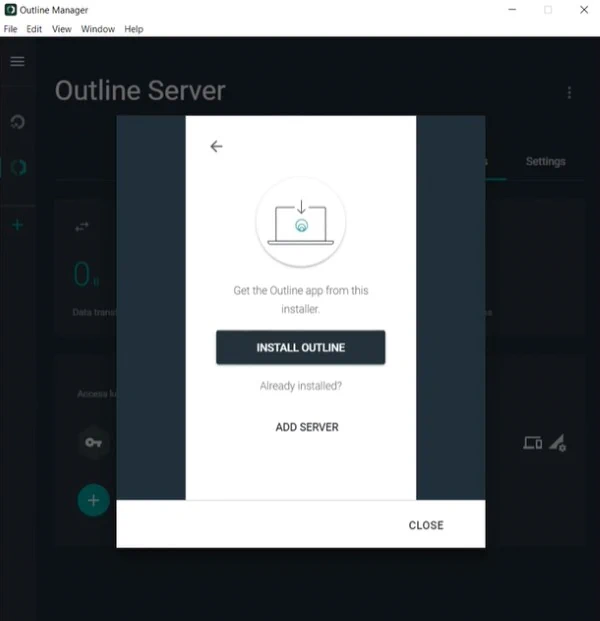
Click the Copy button to copy the access key, then click Install Outline button in the next pop-up window, to start installing the Outline client app. A dialog box will pop up for you to select a save path, you can keep the default and click Save. Then it will download the Outline client installation file. The default file name is Outline-Client. If you are in Mainland China and cannot download it, you can download it from GitHub.
After downloaded, double-click the downloaded file to start installing the Outline client application. Your computer system may ask whether to allow the application to modify your device, you should select "yes". After the installation is complete, the application will automatically open and the interface will be as shown below.
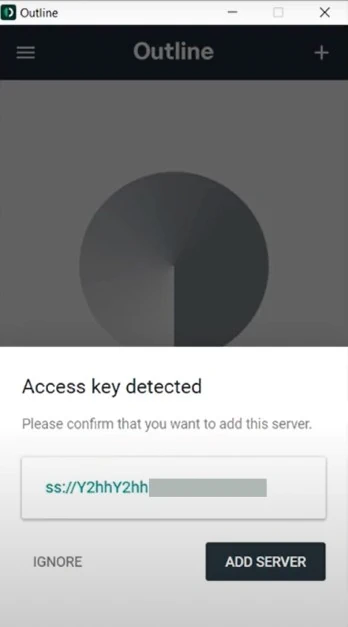
If you copied the access key in Outline Manager earlier, the Outline client application will automatically detect the key you copied and automatically fill it in an input box. Clicking the Add Server button will add the server you previously deployed in Outline Manager to the Outline client, as shown in the screenshot below.
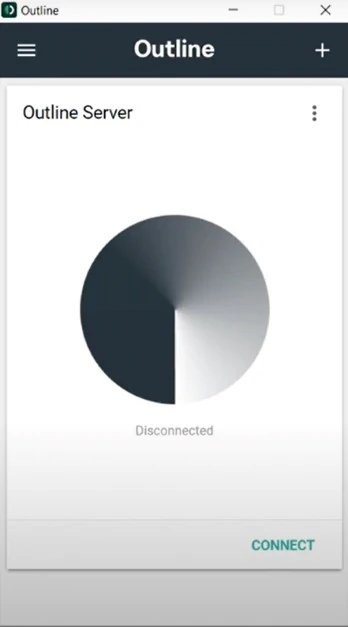
Then you can click Connect in the lower right corner of the interface to connect to the server. After connected, the circular pattern on the interface will turn green.
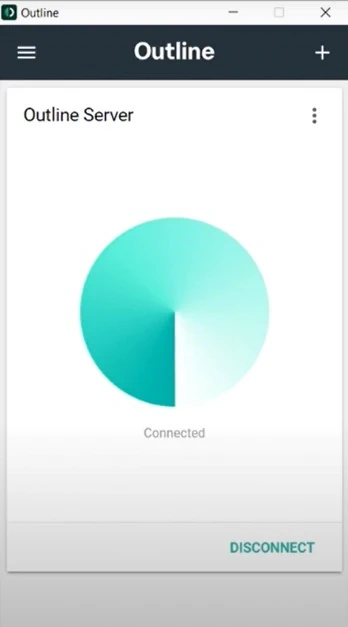
The default name of the server is Outline Server, which is displayed at the top of the interface. You can click the three vertical dots on the right to modify the name. For example, naming the server with the name of the city where the server is located can easily distinguish the location of the server.
After connected to the server, your Internet experience will be the same as in the city where the server is located and your data will be encrypted. If you are in a country with restricted Internet, you can try to visit websites such as Google, YouTube, and ChatGPT to see if you can access them.
When you want to turn off Outline, you can click Disconnect to disconnect from the server.
It is worth mentioning that an Outline server is not limited to one person. It supports multiple people to connect and use it at the same time.
Below is how to share the server with your family or friends.
Share your Outline server
In the Access keys section of Outline Manager, there is a plus button with "Add new key" text displayed next to it. Click this text to generate a new access key. After the key is generated, you can modify its default name, such as naming the key with the name or nickname of someone who you are sharing the key with.
And you can click the three vertical dots on the right and then click Data Limit in the drop-down menu to limit the maximum amount of data he (she) can use per month. This can prevent him (her) from consuming too much traffic, because the maximum amount of data that can be used by the server of the basic plan is 1T per month.
Then click the share button next to the three vertical dots, and a pop-up window will pop up showing an invitation message with several links.
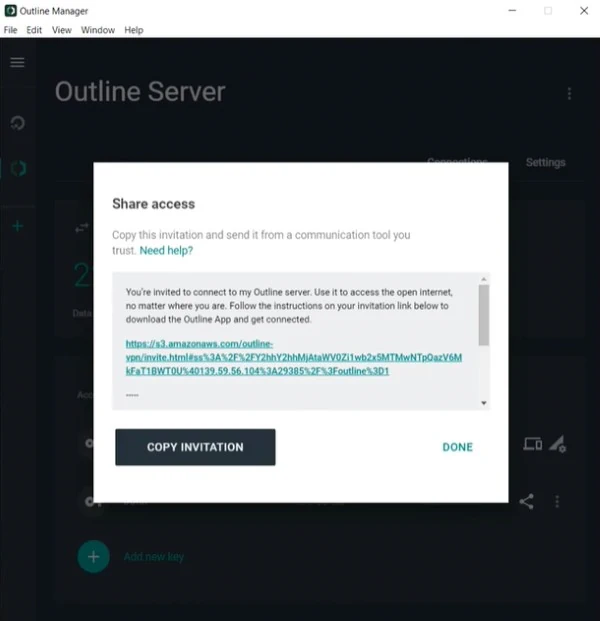
Send this message to the people you want to share access with. You can click Copy invitation to copy the message, and then send this message using email or other communication tools. The first link in this message is for downloading the Outline client, and the second link is the access key. Your family or friends need to download the Outline client application first to use Outline (if the download link is not accessible, you can download the Outline client app from GitHub), and then use the access key to connect to your Outline server. They don't need to install Outline Manager because you have already deployed the Outline server.