When running your website with WordPress, you will often need to make various adjustments and modifications to the website, such as changing themes, installing new plugins, adding CSS code, editing PHP code, etc. If you try to change various themes in a short period of time, it will obviously cause trouble to users; and when making these adjustments, various problems are likely to occur, such as plugin conflicts or system mismatch errors when installing or updating plugins, or updating WordPress versions, which may cause the website to crash and become inaccessible in serious cases.
Therefore, before making these adjustments on your actual website, it is strongly recommended to test it on a website dedicated to testing first, and then formally implement your changes on the actual website when the test finds that there will be no problems.
Most developers build the website for testing on their local computers. The test website built locally can not only make the test visible only to themselves, but also make the test faster, because data transmission is completed on the local machine, and there is no need to consume time through network transmission. So even without an Internet connection, many tests can be done.
Creating a local WordPress website for testing is not complicated. The most convenient way is to use a free software called XAMPP.
The letters of XAMPP stand for Cross-Platform (X, meaning that the software supports installation and use on various systems), Apache (A), MySQL (M), PHP (P), and Perl (P). PHP is the programming language used for WordPress development, MySQL is the database management software used for WordPress websites, and Apache is one of the most popular web server software. XAMPP contains all the elements required to set up a local server environment on your computer, which is very suitable for building local WordPress websites.
This article will show you how to create a local WordPress website using XAMPP.
If you already have an actual WordPress website, you can create a local copy of the website on your computer, we will explain how to copy and migrate the website to the local in another article.
Install XAMPP
Let's get started by installing XAMPP and setting it up to run your local WordPress website.
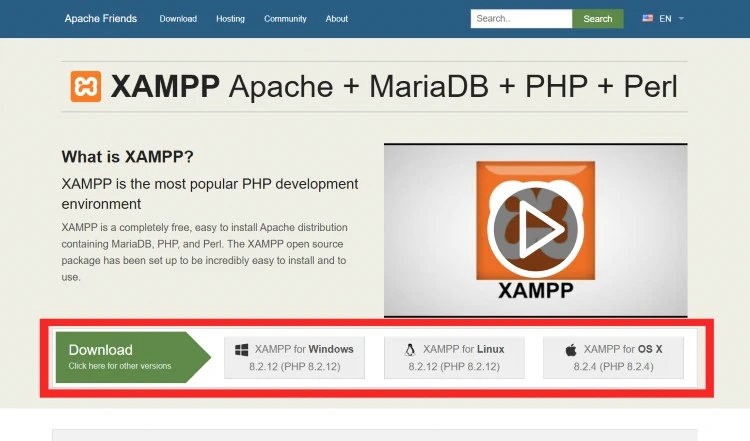
First, visit XAMPP's website. The homepage is the software download page. XAMPP can run on Windows, Mac and Linux computers. Select and click the "Download" button for your operating system.
After downloading XAMPP, double-click the downloaded file to run the installer.
The installation steps and program interface of different operating systems may differ from the screenshots here. This article will show the installation process of the Windows version.
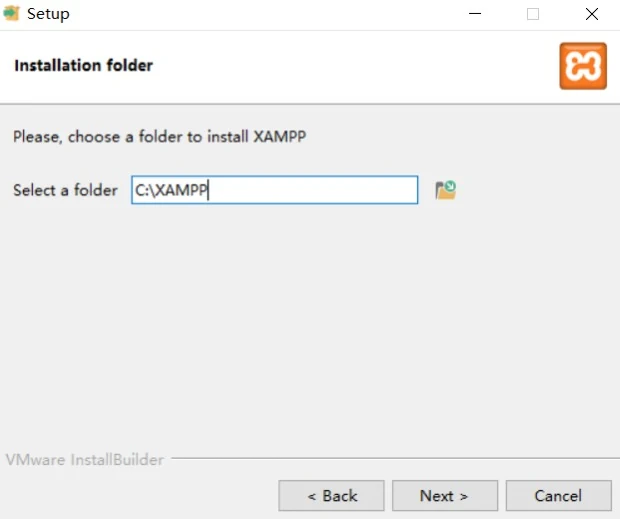
The XAMPP Setup Wizard is like what's shown in the screenshot below.

Click Next button and the wizard will ask for your preferred installation path of XAMPP.
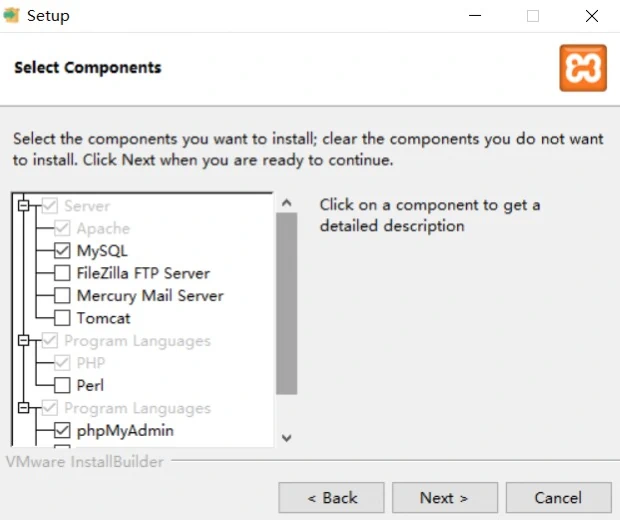
Click Next and it will let you select which components to install. Since our purpose to use XAMPP is to install WordPress locally, we only need Apache, MySQL, PHP, phpMyAdmin, you can uncheck other components. Then continue to click Next.
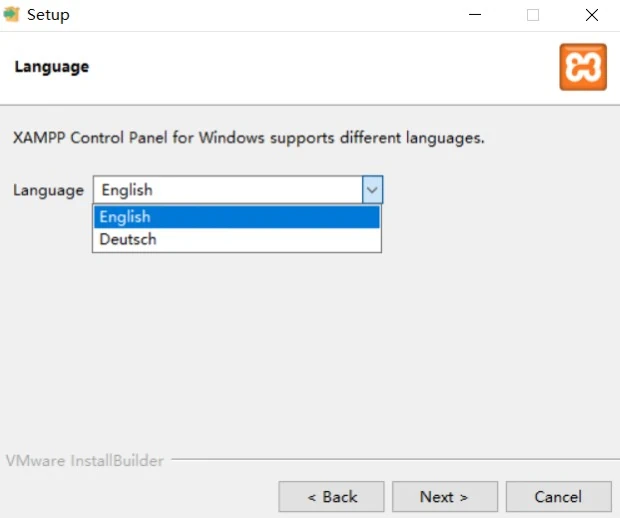
The wizard will then ask you to select a language, just leave it as English, and click Next.
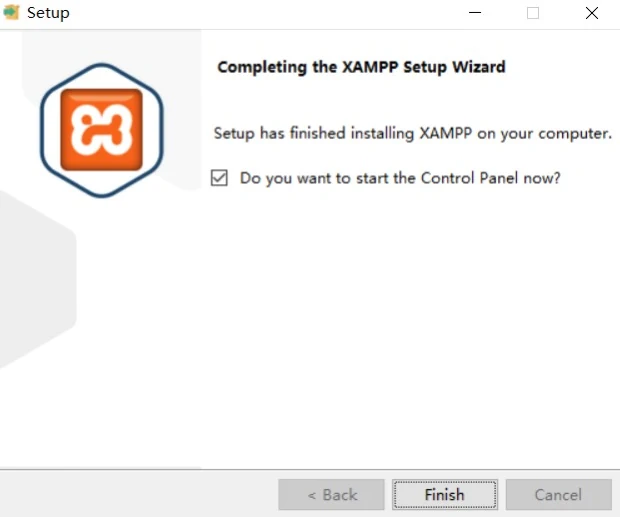
The installation wizard will tell you that setup has finished installing XAMPP. You should tick the "Start the Control Panel now" option and click the "Finish" button to complete the installation wizard.
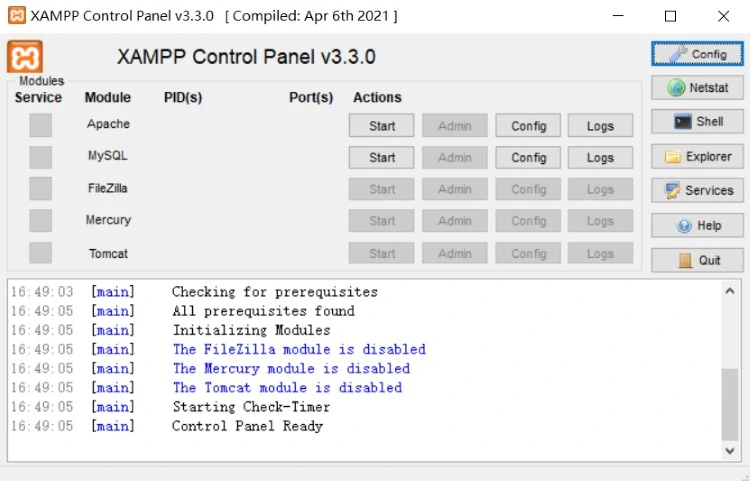
Then the control panel of XAMPP will appear, as shown in the screenshot below.
Start the Local Server
The XAMPP control panel is very easy to use. Since we are going to use Apache server and MySQL database to run a WordPress website, we just need to click the "Start" buttons next to the modules "Apache" and "MySQL" to start both of them.
You may see a Windows Firewall notification after clicking the buttons. You need to choose "Allow access" to enable the server to run normally on your computer.
Once started, the two modules on the control panel will be highlighted in green, and your local server will be started.

You can then start creating your local website.
Let's install WordPress first.
Install WordPress
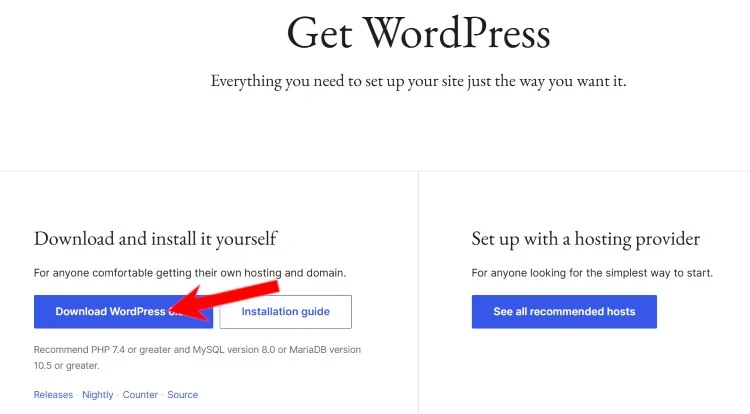
First, visit the website of WordPress, click the "Get WordPress" button on the top right corner, and on the next page, you will find the button to download the latest version of WordPress, clicking it will download a zip file of WordPress.
After that you will then need to unzip the file. Once you're done, open the wordpress-x.x.x folder (x is version number), and you will see a wordpress folder, which you need to copy. Then go to your XAMPP folder, the location is the path you set when you installed XAMPP, if you didn't set a path when you installed it, go to the default location: "C:/Program Files/XAMPP/htdocs" (or "C:/Xampp/htdocs") for Windows, and "/Applications/XAMPP/htdocs" for Mac.
Paste the wordpress folder you copied into the "htdocs" folder.
Then rename the "wordpress" folder to something like "mysite", which is like the domain name of your website and will be used in the URL, and naming the folder will help you identify your local website.
Then open your browser, type the following URL in the address bar of the browser and press Enter:
localhost/mysite/
Note that if you renamed the WordPress folder to something else, replace "mysite" in this url with your own folder name.
The browser will show a WordPress installation wizard page, which will first ask you to select a language.
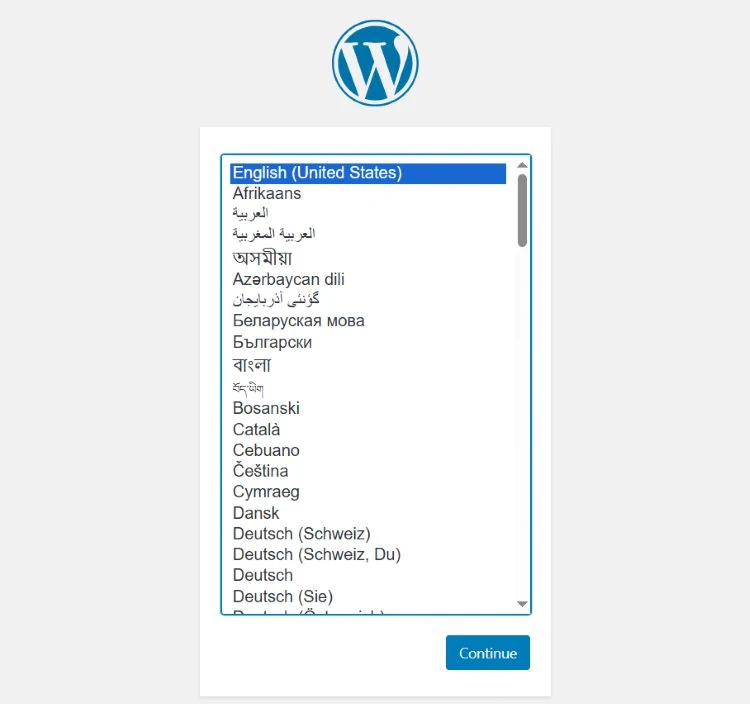
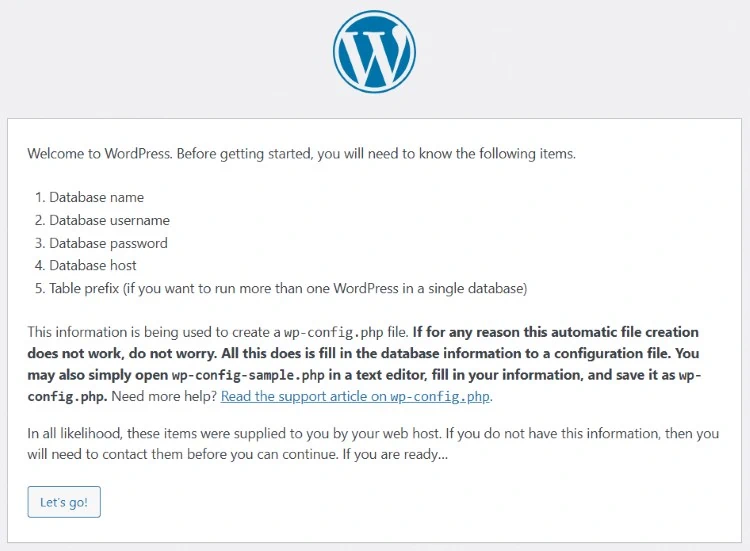
After selecting the language, click the "Continue" button. On the next page, you will see the WordPress welcome message and a notice that WordPress requires a database name, database username, password, and host information.
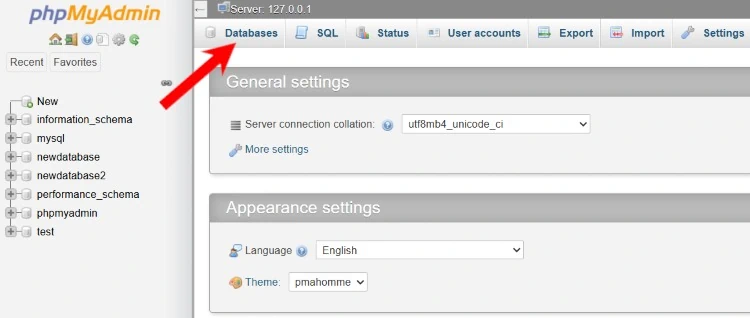
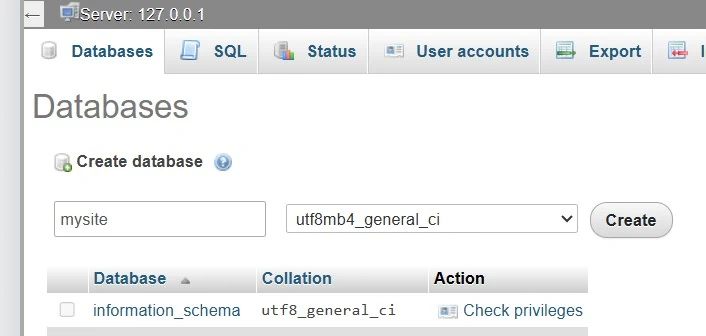
So we have to create a database for the WordPress website. Open a new browser tab and visit localhost/phpmyadmin/. This will launch the phpMyAdmin application that comes with XAMPP, it allows you to easily create and manage databases with a simple interface.
Click "Database" tab to go to the database management page.
Then you can see a input box, enter a name you want for the new database. You can still use the name "mysite", and then click the "Create" button to complete the database creation.
Now you can use the newly created database for your WordPress website.
Switch back to the /localhost/mysite/ browser tab and click the "Let's go" button. WordPress will ask you to provide your database information.
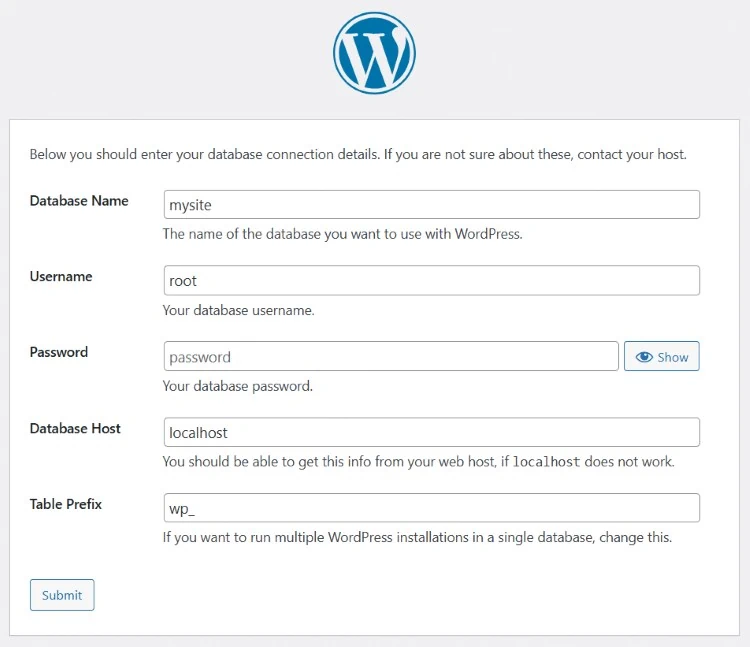
Enter the database name you created earlier, the username should be "root", leave the password field blank, if there is text "password" in the field, delete it. And the database host is localhost. You don't need to change other defaults.
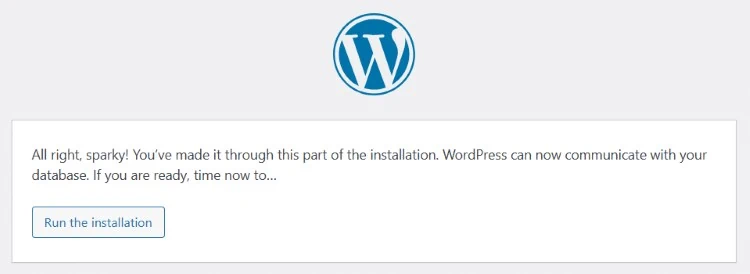
Once you are finished, click the "Submit" button, and it will tell you that WordPress can now communicate with your database. You should click "Run the installation" button to continue.
In the next step, WordPress will ask you to set up the basic information of the website. You need to enter the name that your local website will use, as well as your username, password, and email address.

After filling in all the information, click the "Install WordPress" button to continue.
WordPress will begin to install, and when it is completed, it will tell you that WordPress has been successfully installed and prompt you to log in. Click the login link to enter the login page, or you can access the login page by adding "/wp-admin" after the site url. On the login page, enter the username and password you provided during the installation of WordPress, and then click Login to log in to the admin area of your WordPress site.
At this point, a local WordPress site has been successfully built. You can easily do any testing on this local site, such as trying new themes, plugins, editing php code, etc.